
Removing the Valve Stem Assemblies

Valve stems can be removed when the hot runner is cold or hot, with each method offering its own advantages and disadvantages.


Cold

Hot

Advantage

Disadvantage

Advantage

Disadvantage

  • Fast removal reduces down time

  • Easy to clean

  • No danger from heat

  • Valve stem may break

  • More difficult to remove valve stem

  • Reduces the risk of valve stems breaking

  • Valve stems are easy to remove

  • Slow, increased down time

  • Difficult to clean

  • Danger from heat

To remove valve stems from the hot runner, do the following:

Note:

This procedure should be performed on a work bench.

  1. Remove the hot runner from the machine. Refer to Removing the Hot Runner for more information.
  2. Remove the backing plate. Refer to Removing and Installing the Backing Plate for more information.
  3. If equipped, remove the center plate. Refer to the Ultra Valve Gate Hot Runner Service Manual for more information.
  4. If the valve stems will be removed while the hot runner is cold, proceed to 5. However, if the valve stems will be removed while the hot runner is hot, do the following:
    1. Reconnect any thermocouples that were disconnected during disassembly.
    2. Make sure that the manifold hold down screws are fastened securely to avoid leakage while heating the system up.
    3. Connect the hot runner to a controller.
    4. Turn on the controller.
      DANGER:

      Electrical hazard – risk of death, serious injury and/or damage to the hot runner. Do not turn on the heaters if water has leaked into the hot runner. If water has leaked into the hot runner, the hot runner must be completely disassembled, dried and assembled before the heaters are turned on.

      Warning:

      Hot resin spray hazard – risk of serious injury. Hot resin may unexpectedly spray from the nozzle tips while the hot runner is reaching operating temperature. To avoid serious burns, wear personal protective equipment consisting of a heat-resistant coat, heat-resistant gloves and a full face shield over safety glasses. Use adequate ventilation for fumes.

      Warning:

      Burn hazard – risk of serious injury. Hot runner components stay hot for long periods of time after heaters have been turned off. Wear personal protective equipment when working near the hot runner and place a warning sign in the area before leaving the hot runner unattended.

      Warning:

      Electrical hazard - risk of death or serious injury. Complete the lockout/tagout procedure of the electrical power source before disconnecting the electrical connectors.

    5. Increase the temperature of the hot runner to a temperature high enough to soften the resin in the melt channels.
      Note:

      The Vicat Softening Temperature for the resin type is recommended. Refer to the resin supplier’s documentation for more information.

      Warning:

      Electrical hazard - risk of death or serious injury. Complete the lockout/tagout procedure of the electrical power source before disconnecting the electrical connectors.

    6. Lock out and tag the controller.
      Important:

      Do not allow the nozzle tips to overheat or degraded material will have to be cleaned out of the nozzle housing before a new nozzle tip can be installed.

    7. Disconnect the controller.
  5. For each valve stem to be removed, do the following:
    1. Remove the piston cylinder from the piston.
      Figure 1. Piston Cylinder Assembly
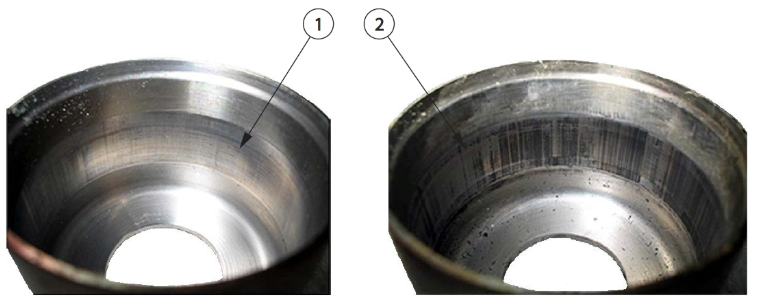
      1. Piston Cylinder

      2. Piston

      3. Backup Pad

    2. From the valve stem removal tool assembly, connect the interface tool to the piston.
      Note:

      Refer to Special Tools for a list of special tools and part numbers.

      Figure 2. Valve Stem Removal Tool Assembly
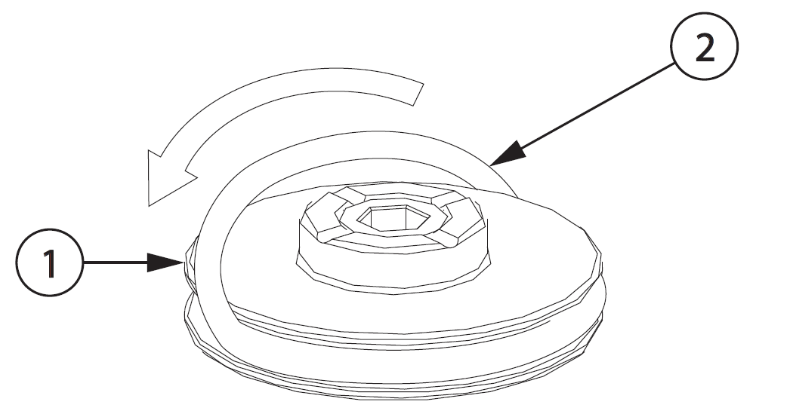
      1. Screw

      2. Interface Tool

      3. Piston and Valve Stem

      4. Valve Stem Removal Tool

      5. Valve Stem Removal Tool Base

      6. Nut

      7. Cap

    3. Slide the valve stem removal tool base onto the interface tool.
    4. Lower the sleeve and insert the cap beneath the thrust washers.
    5. Hold the valve stem removal tool in place and rotate the top nut clockwise until it is tight.
      CAUTION:

      Mechanical hazard – risk of damage to the equipment. Be careful not to bend the valve stem when removing it. Bent valve stems cannot be re-used.

      CAUTION:

      Mechanical hazard – risk of damage to the equipment. If the valve stem and piston do not pull out easily, the valve stem may have seized in the manifold bushing. If this is the case, remove the manifold bushing from the manifold and remove the valve stem. Contact Husky for more information.

    6. Using a wrench, rotate the nut on the valve stem removal tool clockwise to remove the valve stem assembly.
      Note:

      Double delta seals must be replaced during the installation of the valve stem assemblies. Do not remove them at this time.

    7. Remove the set screw and valve stem from the piston.
      Figure 3. Valve Stem Assembly
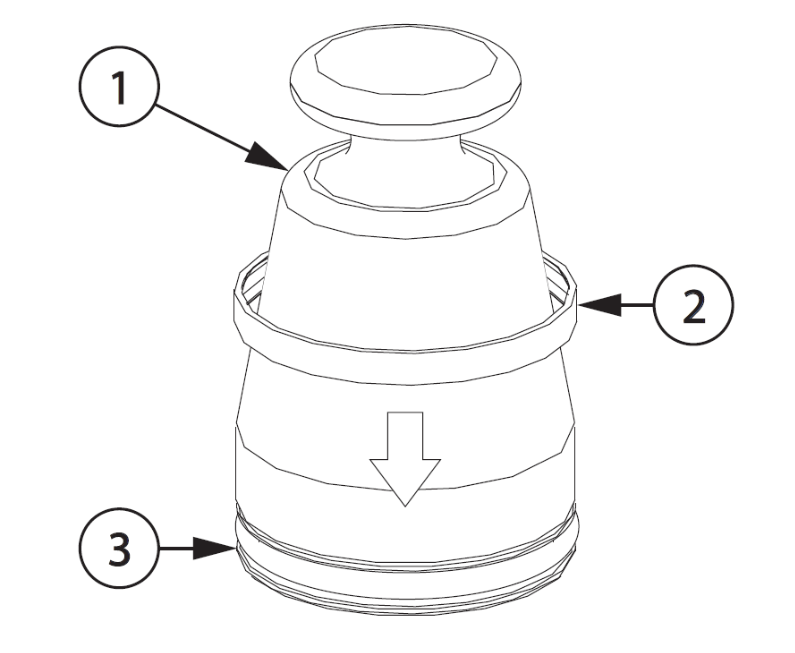
      1. Set Screw

      2. Piston

      3. Double Delta Seal

      4. Valve Stem

  6. Inspect the gate end of the valve stems to make sure there is no damage or wear. If possible, use a new valve stem for comparison.
    Warning:

    Burn, fire and gas hazard – risk of death or serious injury, and property damage. Use of an open flame to remove resin can produce harmful gases (depending on the resin type), damage components and increase the risk of fire. Only use open flames sparingly and in a controlled environment.

    Warning:

    Burn hazard – risk of serious injury. To avoid serious burns, wear personal protective equipment consisting of a heat-resistant coat, heat-resistant gloves, and a full face shield over safety glasses. Use adequate ventilation for fumes.

    CAUTION:

    Mechanical hazard – risk of damage to the equipment. Abrasives should never be used to clean the valve stems, as this could damage the critical sealing surfaces.

  7. Remove any resin deposits from the valve stems. If required, carefully heat the resin deposits with a propane torch and then wipe the deposits away with a clean, soft cloth. This may have to be repeated several times.
  8. Make sure the valve stems are not overheated, scratched, scored, bent or worn. Replace each valve stem if it shows signs of this type of damage.
Back to Ultra Valve Gate Hot Runner Maintenance