
To remove the backing plate, do the following:
Note:
The following procedure requires the use of an overhead lifting device. Refer to Lifting and Handling for lifting and handling instructions.
- Remove the locating ring.
Figure 1. Removing the Locating Ring 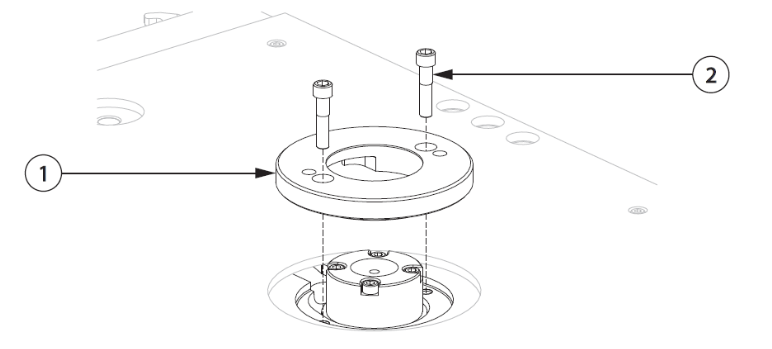
-
Locating Ring
-
Screw
-
- If equipped, remove the insulator board from the back of the backing plate.
Figure 2. Removing the Insulator Board 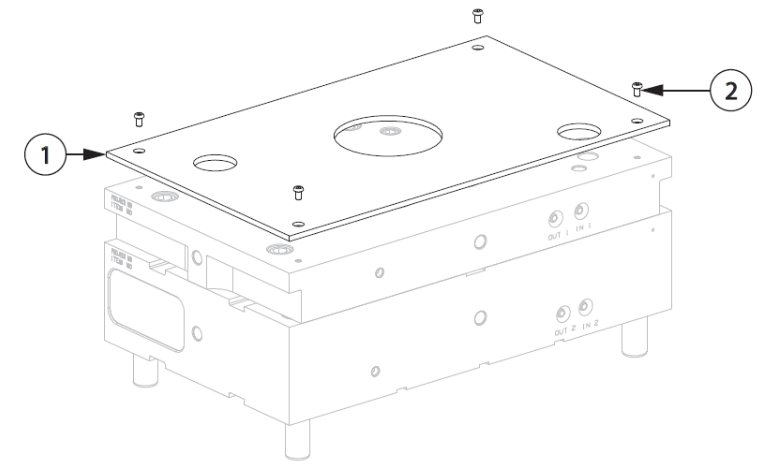
-
Insulator Board
-
Screw
-
- Remove the screws that connect the backing plate to the manifold plate.
Figure 3. Removing the Backing Plate Screws 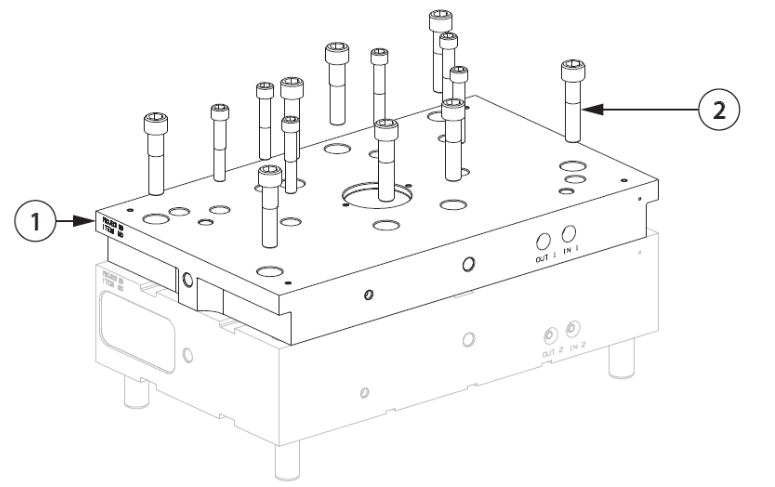
-
Backing Plate
-
Screw
Warning:Crushing hazard – risk of death or serious injury. Inadequate lifting equipment could fail and cause death or serious injury. Make sure all lifting equipment is rated for the load and in safe operating condition.
-
- Attach an overhead lifting device to the hoist rings and lift the backing plate in stages. Use the pry slots between the manifold plate and backing plate to assist in separation.
Figure 4. Removing the Backing Plate 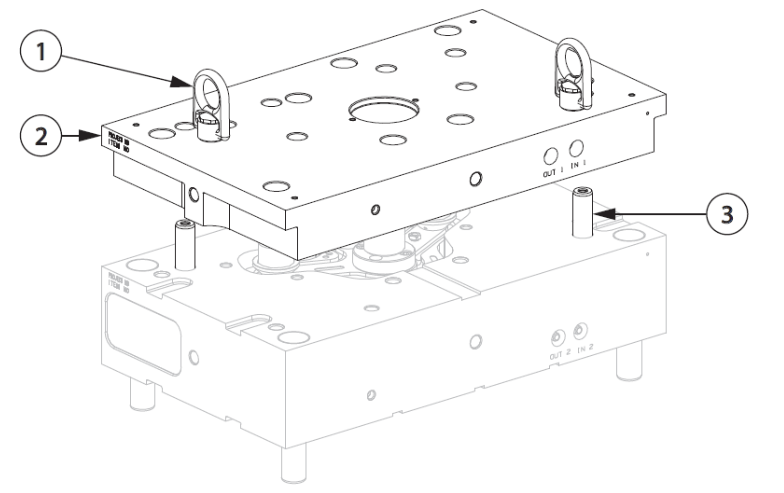
-
Hoist Ring
-
Backing Plate
-
Guide Pin
-
Why order through the Husky Spare Parts Portal?
- Access to online spare parts promotions
- Order genuine Husky Replacement parts anytime, 24/7
- Quickly find the parts you need
- Access your order history and track deliveries online
Need Help with Spare Parts or Preventive Maintenance Kits for Your Hot Runner?
Fill out the form below and our team will contact you.